


Who needs an automated patient registration process?
Even with an electronic health record (EHR) in place, physicians spend 49% of their time doing paperwork, on average. This paperwork time-suck can be easily reduced and avoided by digitizing your patient workflows.
Your patients don’t want to be stuck in a waiting room filling out paperwork, and your office team is too busy to waste time. So, if you’re looking to modernize your workflows, patient registration is a good place to start.
What do you need for this tutorial?
1. A patient registration document with merge fields ({$FirstName}, {$DealName}, etc.)
2. Formstack Forms account
3. Formstack Documents account
4. Formstack Documents API Key and Secret
5 Steps to Automated Patient Registration
Step 1: Build your document
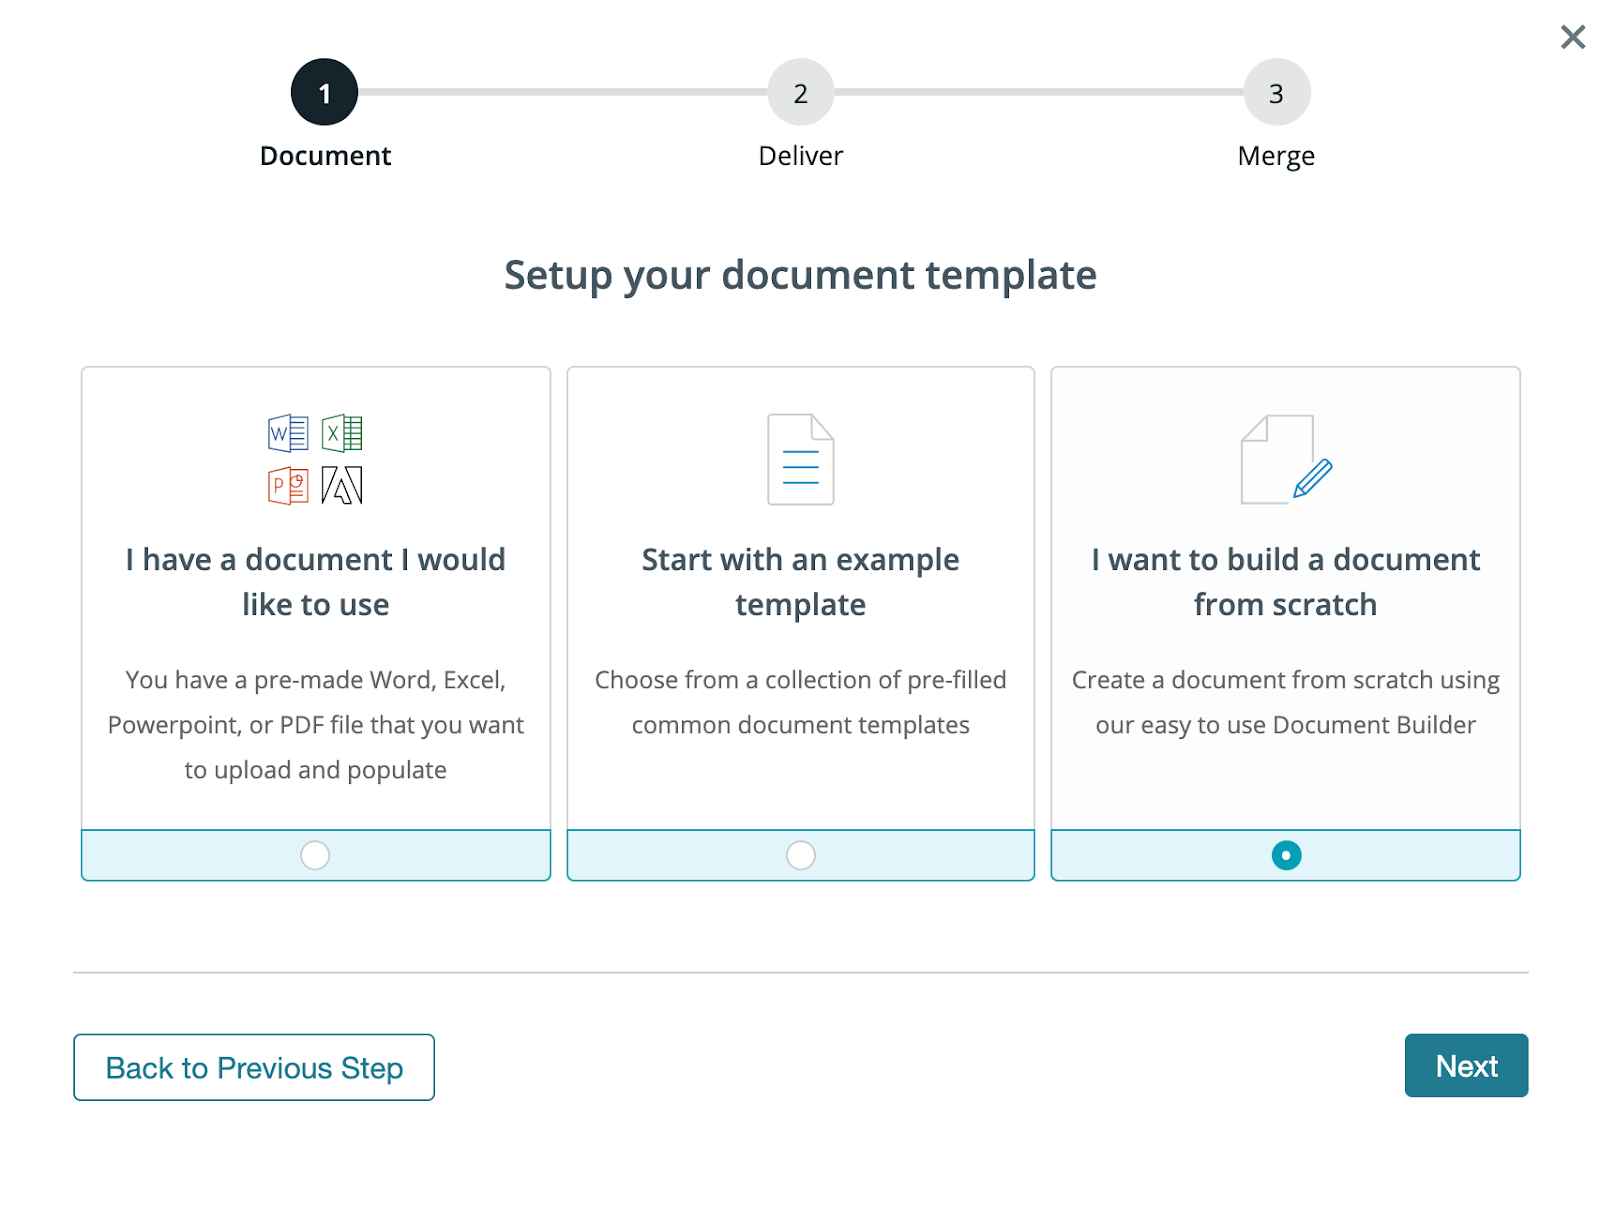
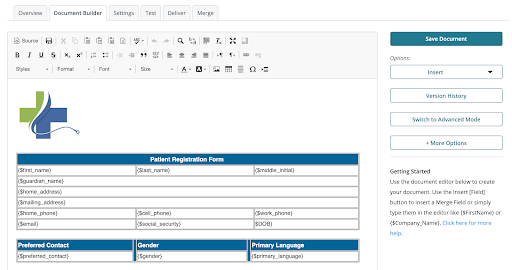
We’ll start in your Formstack Documents account. Select “New Document.” You’ll be prompted to give your document a title and set up your template. You have the option to upload a Microsoft Word document, Excel spreadsheet, PowerPoint, or PDF; to start with a Formstack Documents example template; or to build your document from scratch. For this example, we’re going to build our patient registration document in the document builder.
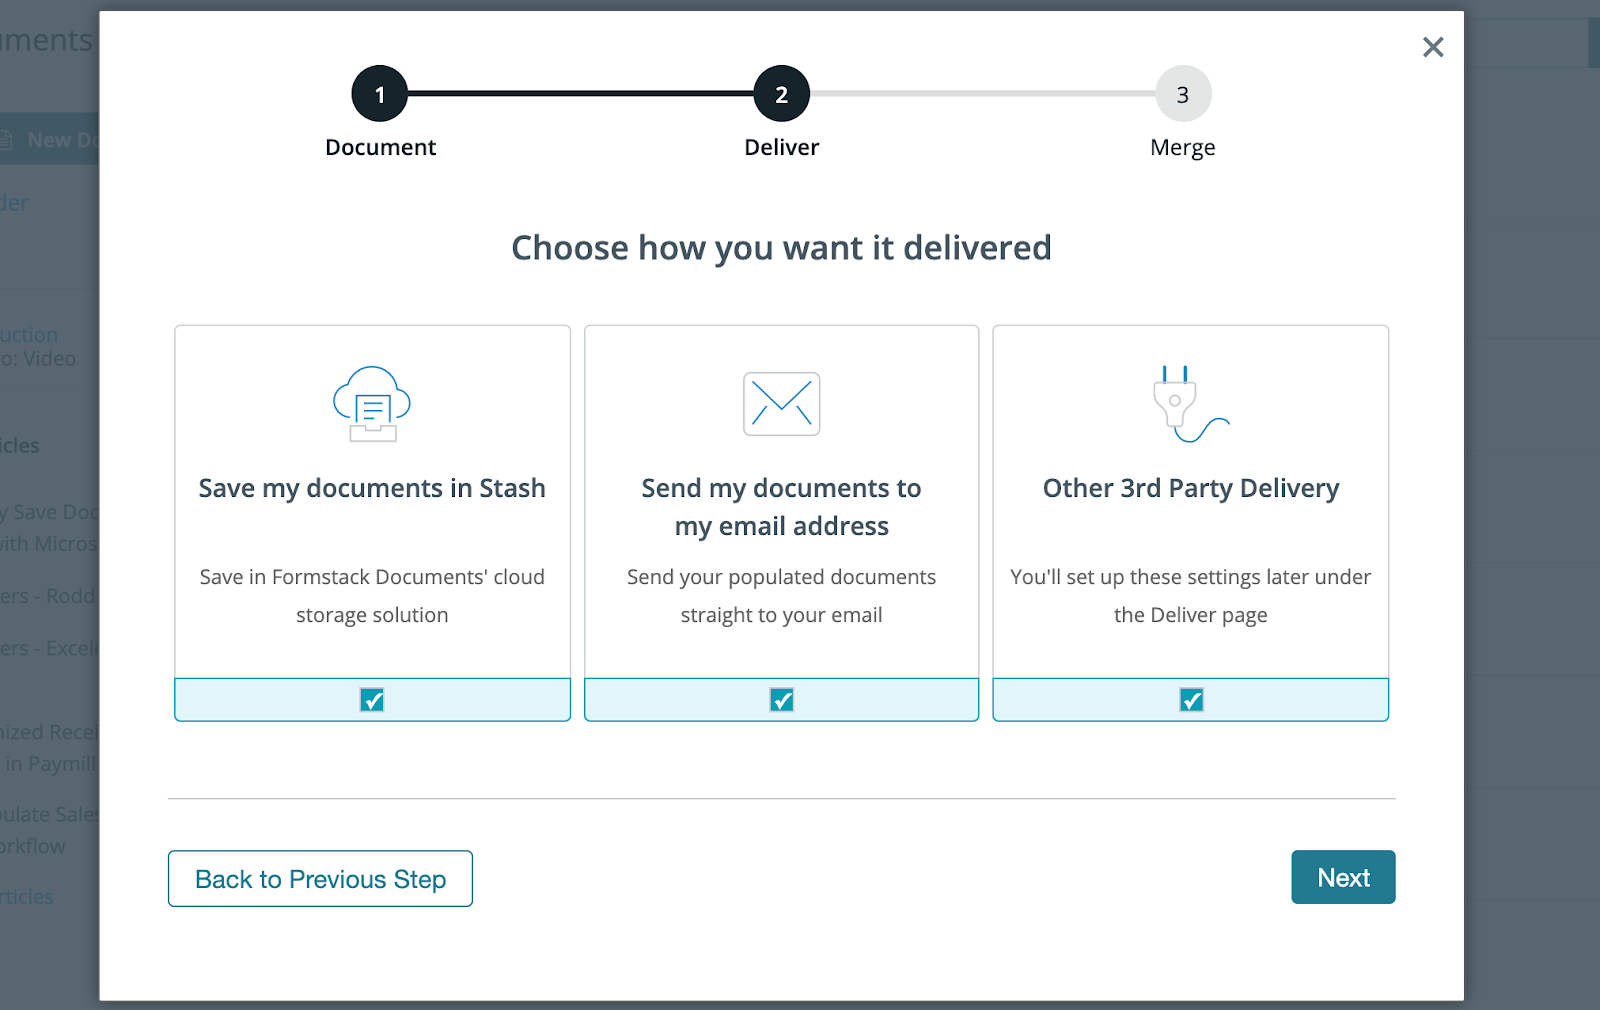
Next, choose how you want to deliver your populated document. We’re going to choose to save our document in Formstack’s HIPAA compliant cloud storage tool, Stash, share our document with our clients by email, and send our document for signature using Formstack Sign. Select “Other 3rd Party Delivery.”
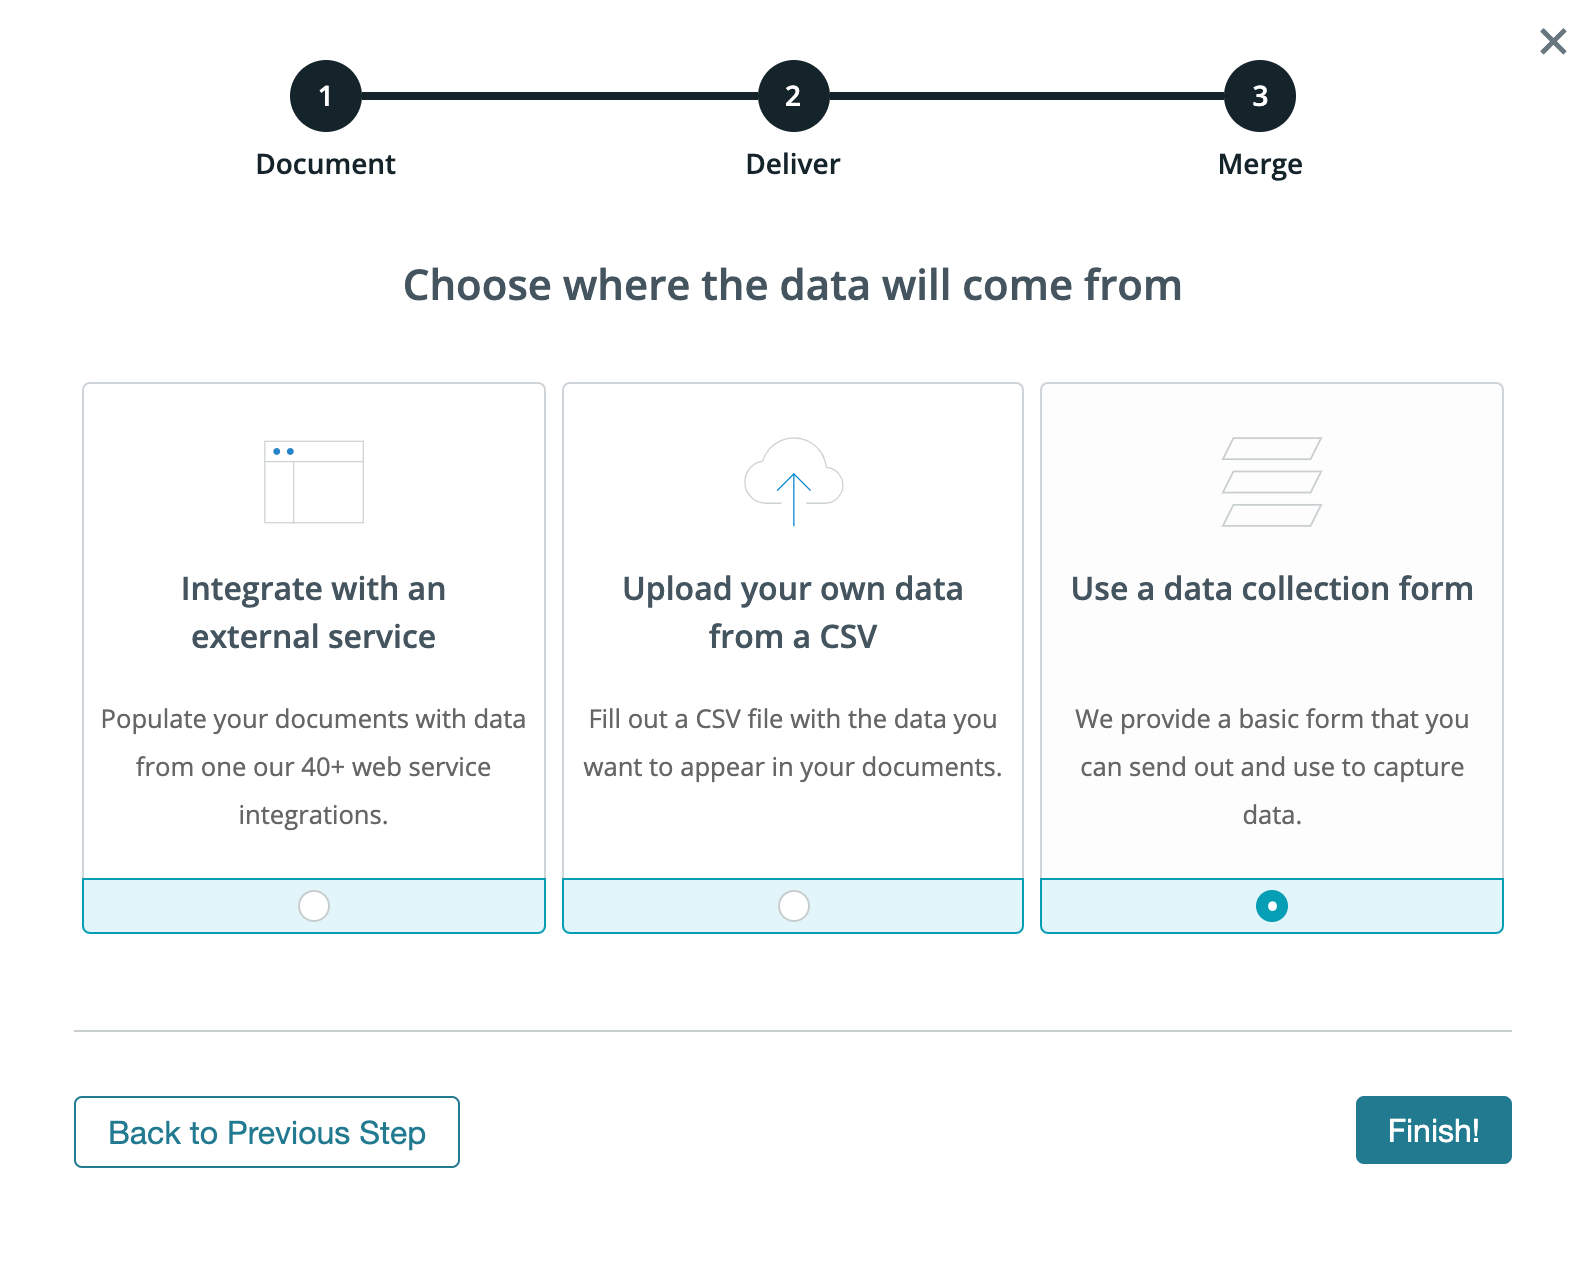
Finally, we need to choose where our data is coming from. We’re going to have patients fill out their registration forms using a form on our site. So, we’ll select “Use a data collection form.”
Here’s a look at our final Rental Application once we’ve added our merge fields. The last thing we need to do to prepare our document is add signature tags so Formstack Sign knows where to populate our document with signatures.
Select where you want your signature to populate. On the right-hand side of the screen, select “Insert.” Here, you’ll see a dropdown list of preset fields you can add to your documents. Scroll down to “eSignature Tag.” Here, we’ll choose Formstack Sign, and insert a signature tag. We’ll also insert a date tag.
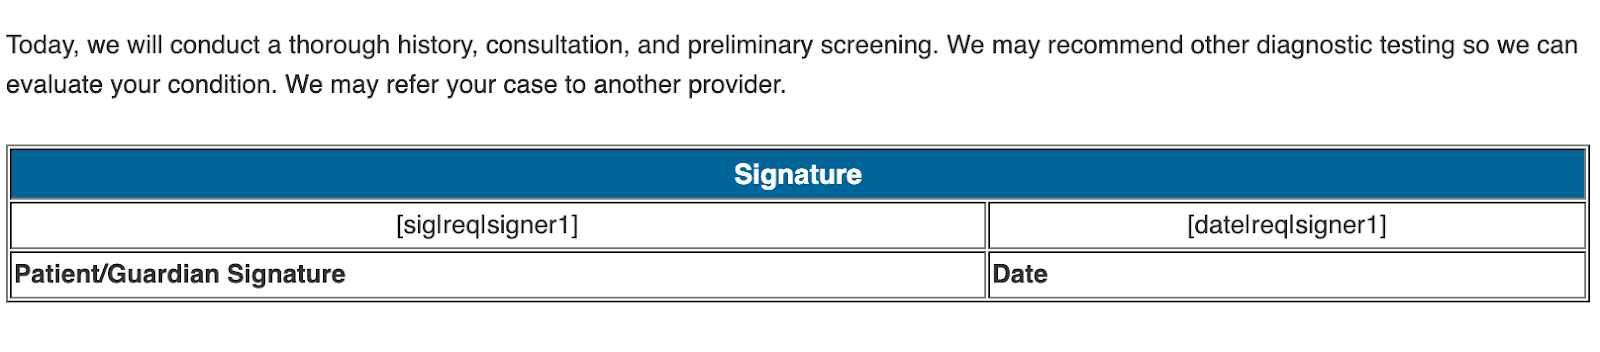
eSignature tags are made up of three components.
1. Text Tag Type
The first part signifies the “type” of text tag. Formstack Sign offers a few different “types” of text tags, which include:
sig – to require a signature (Example: [sig|req|signer1])
check – for creating a checkbox (Example: [check|req|signer1])
initial – for requiring a signer’s initials (Example: [initial|req|signer1])
date – to auto-populate the date when passed through Formstack Sign (Example: [date|req|signer1])
text – to provide a short answer text box in place of the text tag (Example: [text|req|signer1])
2. Required Field
This part of the tag lets Formstack Sign know whether or not the field is required. (Examples: [sig|noreq|signer1], [initial|req|signer1]).
3. Signer Identification
Since you may have multiple people who need to sign your document, the last part of the tag identifies which signer should sign where. (Examples: [sig|req|signer1], [sig|req|signer2], [sig|req|signer3], etc.)
After you’re finished adding your text tags and creating your template, change the color of your text tags to white. This will “hide” them inside your document.
Step 2: Set up delivery
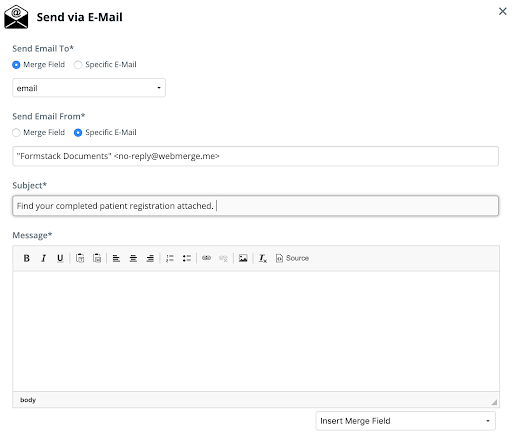
Now that we’ve added our signature tags, we can save our document, and set up our delivery. When we first set up our document, we said we wanted to share it by email, so Formstack Documents has gotten our email started. We’ll update the subject line and body of our email and use a merge field to send our document directly to the email address included by the patient on their registration form.
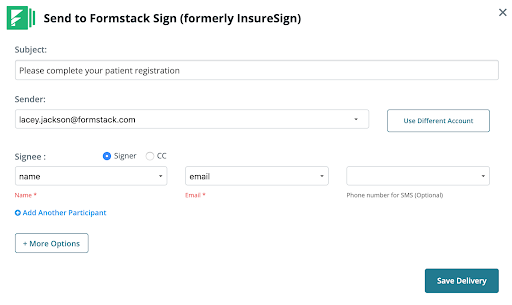
Now, we’re going to prepare our document for signature. On the delivery screen, select “New Delivery” and choose eSignature. You’ll find Formstack Sign at the top. Simply add a subject line to your email, designate a sender email, and select the merge fields that contain the signer’s name and email. You also have the option to send your document for signature by text message.
We plan to collect data for our patient registration using a Formstack Form embedded on our website. To do this, we’re going to use the handy Export to Formstack feature. This feature lets us automatically create a Formstack Form that matches the merge fields on our document. Simply choose the document you’d like to use, and select Create Formstack Form.
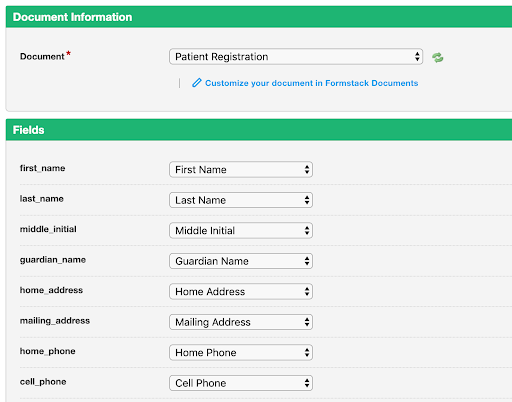
Now, you can see that Formstack has created a field to match each field in our patient registration document. We’ll make sure everything was added correctly and add sections and saving points to make sure our form is beautiful and easy to use.
Step 3: Prep your integration
Once our registration form looks good, we’ll navigate to settings and prepare our integration. Because we used the Export to Formstack feature, our Formstack Documents account is already integrated and authenticated, and the fields have been mapped. We’ll just need to review it to make sure everything looks correct.
It’s time to run a test!
Once you hit submit on the form, an email will be sent to the patient with the completed documents for them to sign. When patients receive the email, they’ll simply follow the link, review their submitted data, and click to sign.
And that’s it! Start saving time for your patients and your back office with this intuitive, easy-to-use patient registration workflow.

